How big do you want your fonts displayed? Do you want a readable, magnified view, or would you prefer to have as much material on-screen as possible? By adjusting the font size on your computer, it is possible to make valuable modifications to the way your computer works. This definitive guide will show you how to alter the font size of almost any aspect of your computer’s interface, allowing you to tweak your visual experience to meet your needs exactly on Windows and Mac.
Understanding Font Size:
Font size is the character height of what appears onscreen. It’s measured in points (pt) and bigger numbers are bigger fonts.
Why Change Font Size?
There are several reasons to adjust font size:
Better readability: If you disabled the font-variant switch for your keyboard shortcuts, you can use a desktop Shortcut Mapper. For those of us who are vision-impaired or simply partial to bigger text sizes, making text on the screen easier on our eyes can offer a better reading experience.
Smaller type: fewer pixels per line means you can fit more information on a screen at once. That makes for faster, more efficient reading and work especially when you’re browsing the web or entering data in a spreadsheet.
Personal choice: In the final analysis, optimum font size is really up to you: adjust it to achieve those reading states that are comfortable and visually pleasing for you.
Changing Font Size in Windows 10:
There are two primary ways to adjust font size in Windows 10:
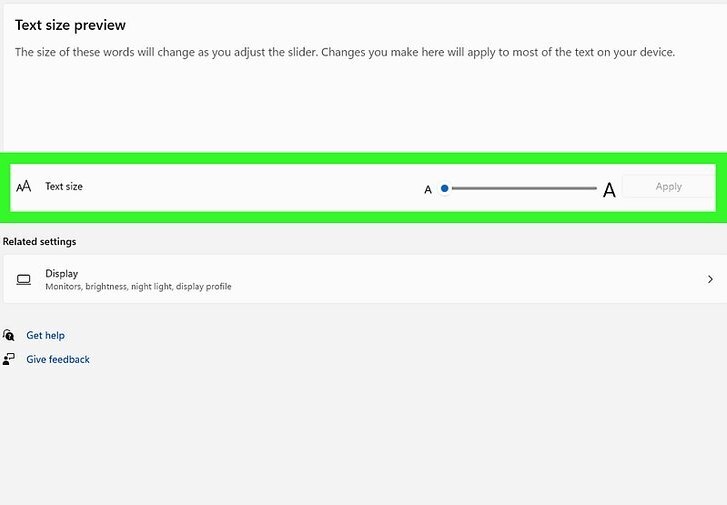
System-Wide Scaling: The Current (entire PC) option would resize all text on your computer, including menu sizes, icons, program windows, and other graphical changes.
Make sure the Start menu is open (click on the Windows button in the bottom-left corner of the screen) and select the gear icon to open Windows Settings.
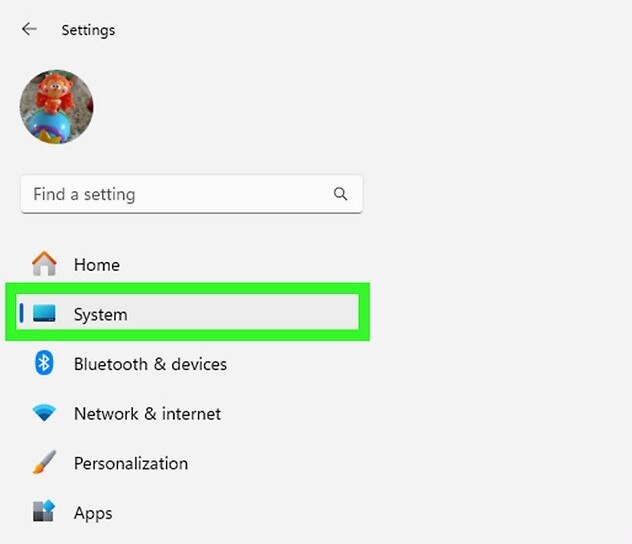
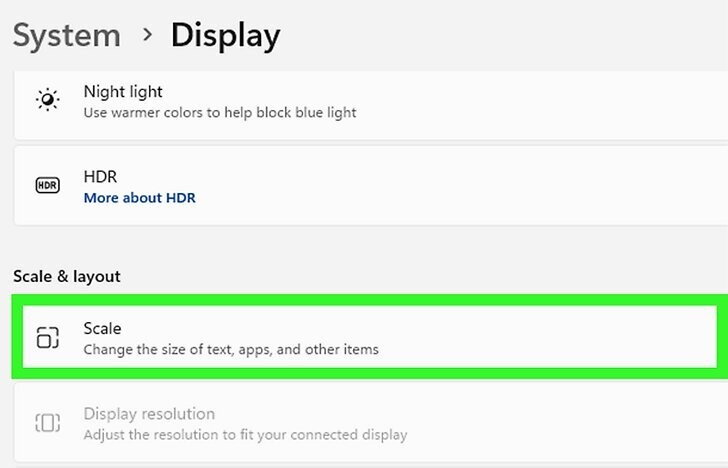
Navigate to “System” and then select “Display.”

Under the ‘Scale and layout’ section, a drop-down menu appears. This menu provides percentages for what the entire display should be scaled to; a higher percentage makes everything bigger—text, icons etc.

Preview the changes and select “Keep changes” to apply the new scaling.
Changing Font Size in Individual Programs: Maybe you want larger text in your text editor, but smaller menus in your spreadsheet app. Well, you’re in luck, because many programs offer settings to tweak font size for the text, menus and other elements specific to that app. To do this, navigate to the program’s View menu (in text editors, where it’s less likely to be called ‘View’ and a bit more magical, it might be called ‘Formatting’ or ‘Styles’ or ‘Display’) or to its Preferences menu to find the font size settings.

Changing Font Size on Mac:
On Mac computers, you can adjust font size in two ways:
System-Wide Zoom: This scales all things on screen (as Windows scaling does).
Click on the Apple logo in the top left corner of your screen.
Select “System Preferences” and then “Accessibility.”
Click on the “Zoom” tab.
You can increase or decrease the scale of the zoom (and thus the font size) by sliding back and forth or entering a percentage.
Changing the Font Size in Individual Programs: Similar to Windows, many Mac programs offer within their specific settings an ability to change font size of individual items such as menus or text.
Additional Tips:
Use Keybaord Shortcuts: Both Windows and Mac have keyboard shortcuts that zoom in and out; a great trick when you want to do on-the-spot font scalings.
Play with High DPI Settings: If you have a high-resolution display, you can increase character sharpness by setting high DPI settings in the control panel’s display settings.
Browser Zoom: All modern web browsers allow you to zoom in and out of web pages using keyboard shortcuts or through the zoom controls within the browser.
Conclusion:
With this in mind and the methods above, you can tailor your computer display to match your font size preference. That is, find the font that works best for you. There is no hard-or-fast rule that fits everyone. Play around to see what you like best.


