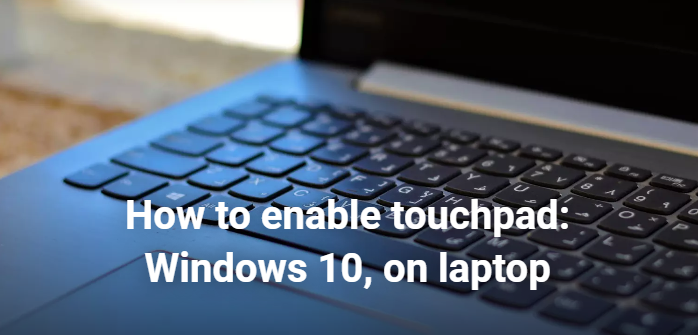
Whenever you see that small patch of dark gray or black, you can use the pad to move, click, or perform other gestures without needing a device like a mouse. Today, we all have laptops, and every one of them features this convenient ability at your fingertips. But what can you do when your touchpad refuses to respond to your signals? Suddenly, your ability to navigate around and log in to the OS has been compromised. Today you’re going to figure out how to activate a disabled touchpad in Windows 10. More importantly, you’ll leave this brief tutorial with a number of different means at your disposal, along with a little information on a couple of helpful customization options.
Understanding Why Your Touchpad Might Be Disabled:
There are a few reasons why your touchpad might not be responding:
Accidental Deactivation: Perhaps you inadvertently deactivated the touchpad by activating a keyboard shortcut or a function key combination found on some laptop computers.
Driver Issues: Outdated or corrupted touchpad drivers can also cause malfunctioning.
Problems Related to Hardware: In this case, the probable cause is a physical problem linked to the touchpad itself.
Enabling Your Touchpad in Windows 10:
Here are three effective methods to get your touchpad functioning again:
Method 1: Using the Function Key Combination:
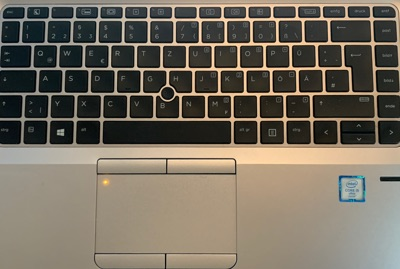
Many laptops have a key that looks like this: FnIt’s often labelled Fn. Pressing the Fn key in combination with another key will disable or enable the touchpad. If your Fn key sits next to an icon of a touchpad, then pressing the Fn key plus the touchpad key might turn your touchpad back on.
Method 2: Enabling Through Settings:
From the Start menu, click the icon that looks like a gear. 3. From the Windows Settings menu, click on System. 4. Click About.
Navigate to “Devices” and then select “Touchpad.”
Ensure the toggle switch under “Touchpad” is set to “On.”
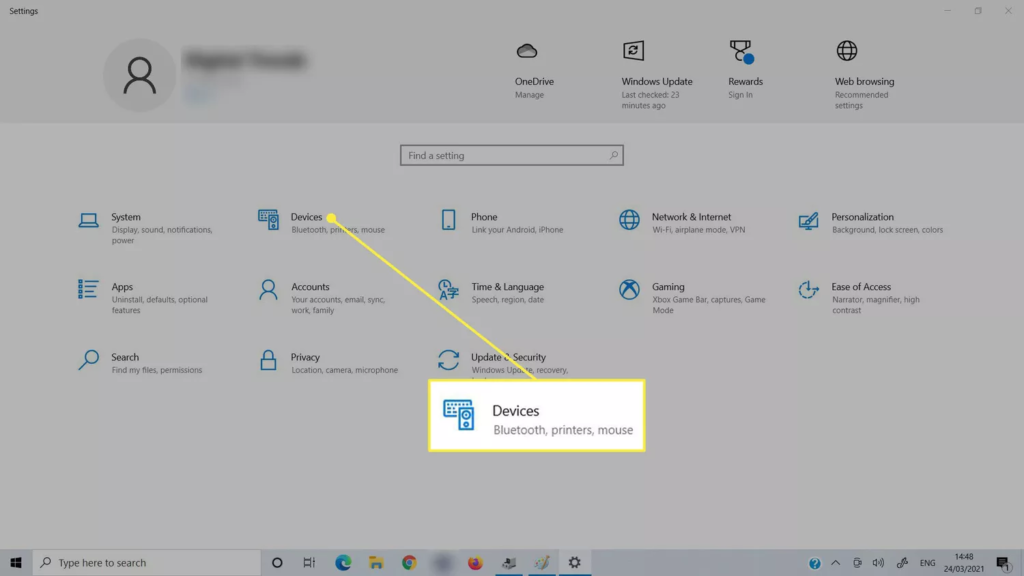
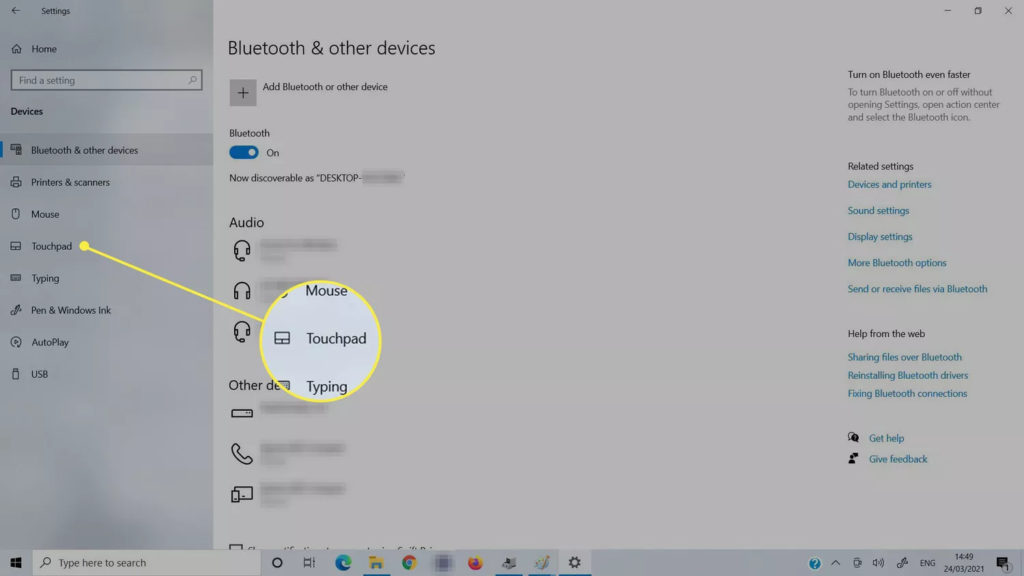
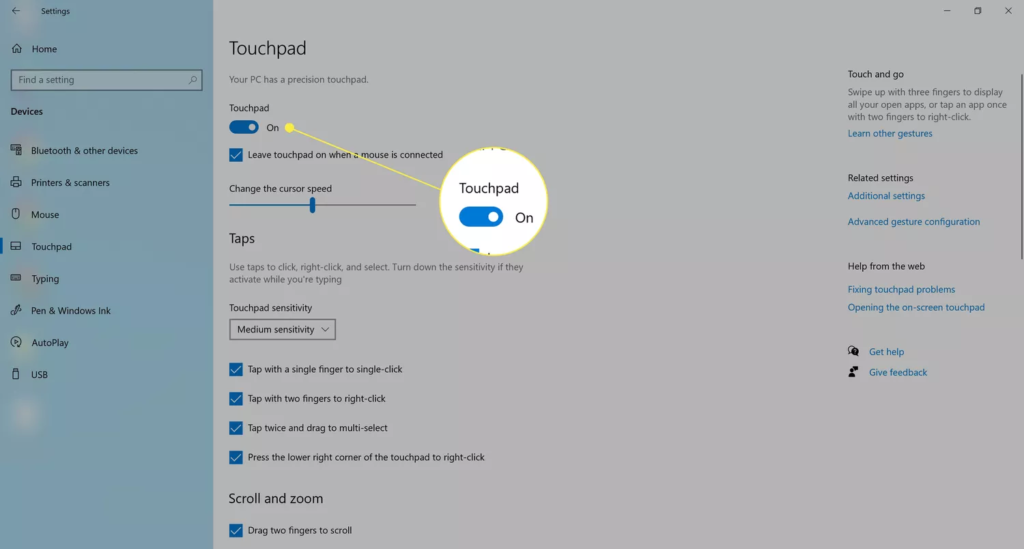
Further Options: This menu can give you more control over the behavior of your touchpad: Tap to Click: This usually provides an option to allow or disallow your touchpad to click if you land on something while passing by. Scrolling: This can allow you to configure scrolling gestures on your touchpad. Palm Rejection: Here, you can enable your system to recognize and not register your hand resting on the touchpad.
Method 3: Updating Touchpad Drivers:
Now open Device Manager by searching for ‘Device Manager’ in the Windows search bar again: Looking through it, if the display with the yellow exclamation mark is under the Audio inputs and outputs, here’s what the sound problem could be. If your laptop doesn’t have an internal mic for some reason, or something is clogging it, it’ll likely say something similar.
Expand the “Mice and other pointing devices” section.
Right-click on your touchpad device and select “Update driver.”
Select ‘Search automatically for updated driver software’. Then click on the ‘Search automatically for updated driver software’ link. Behind the scenes, Windows searches its database for updated driver software for your touchpad, and installs it for you.
Troubleshooting Tips:
Restart the Computer: This should resolve a lot of temporary issues that could be the cause of a touchpad not working properly.
Look Up the Laptop’s Operating Instructions: If all else fails, check your manual, if you can find it. The laptop manual might list a special function-key combination that activates the touchpad on your model.
Check for a BIOS Update: very rarely, old BIOS firmware can interfere with touchpad operations. See the website of your laptop’s manufacturer for instructions on updating the BIOS, if required. (Warning: Updating a BIOS can be risky business; proceed at your own risk.)
Conclusion
So, if you take into account the step-by-step guideline presented above and the troubleshooting tips, your touchpad should be enabled in Windows 10. For persistent problems, you can simply reach out to your laptop manufacturer’s customer support for additional help. Voilà, the digital world is at your fingertips… literally!
